Tutorial - Page 2
If you've not familiarized yourself with the Report Formatter you need to right now.
There are two goals for any report that you create: properly extract information that you need, and try to make it visually pleasing. The second goal is sometimes elusive; everyone has their own opinion as to how reports should look like. The first goal is much simpler, once you understand how the Report Builder "engine" works.
It helps some users to think of a Report Builder as a big circle. Inside the circle is the information that you (or your users) have input into the database. Using a DETAIL BAND in the report will start at the top of that circle (at the first database record), then loop through all the inputted information until the last database record is reached, bringing you back to the top of the circle once again. A DETAIL BAND is responsible for doing the "grunt work" of accessing the database, retrieving the database information and printing the database field in the area that you tell it to.
Every report that you create will have a DETAIL band in it. While there are many different types of report "bands" that you can use, a DETAIL band is mandatory - without it the information in your database will never be processed. Before adding a DETAIL band let's go ahead and define some basic information about the report.
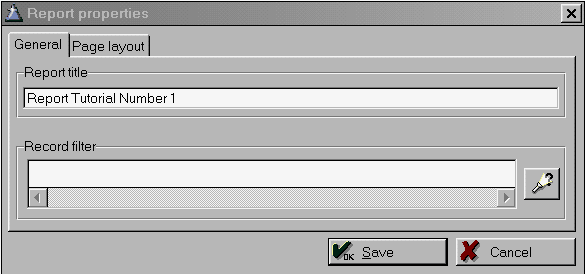
Click the main menu option titled FILE, then select REPORT PROPERTIES from the dropdown menu. A window will appear asking you for the Report Properties. The Report Title is the description that will be displayed in the Reports Manager window - you want to give a meaningful description that others can understand in this entry field. The Record Filter entry field allows you to use the Dictionary to assist in creating a filter condition. Record Filters will be described in much more detail in later lessons - in a nutshell a filter allows you to print ONLY the information that you desire (such as: print all names for customers living in Hawaii). Here is what the screen looks right now:

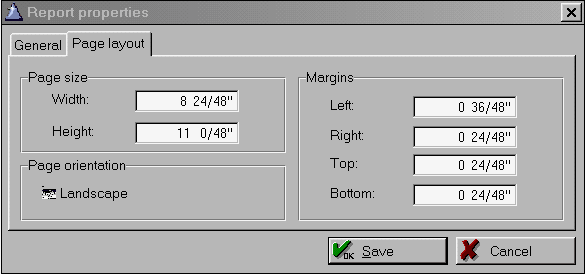
Click on the second tab labeled "Page layout"; on this tab you can override the default settings for the generated report. The default settings are for 8.5x11 portrait output, with small margins on all 4 sides of the generated report page. You can also change the report orientation to landscape by clicking on the Landscape checkbox. For now the default settings will be used. Here is the screen:

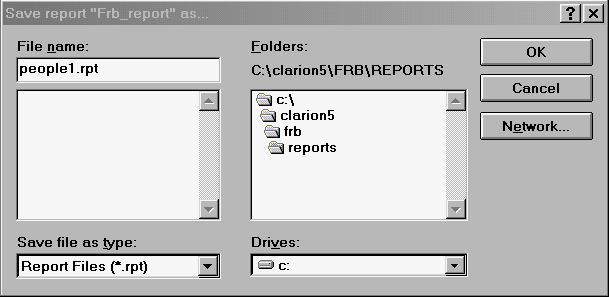
We'll go ahead and click the SAVE button to save the report page information. At this point we need to save the report to the *.RPT file that is stored in the \REPORTS directory. Click the FILE main menu option, the select the SAVE AS menu option. A window will appear onscreen that you've seen in other Windows applications - you are being prompted for a location to save the file, and a filename for the file. The default folder will be the \REPORTS folder located directly "underneath" the location where your database program is installed to. This is the desired location for ALL reports that you create, so go ahead and leave the location alone. For the filename you want to create a unique filename for all new reports. You can use the Windows 95/98/NT long filenames if you want, or give it a 8 character filename - the choice is yours. Leave the *.RPT file extension alone - you do NOT want to use a file extension different that *.RPT!!
For this report a filename of PEOPLE1 will be given, with the screen resembling:

Now that the filename is input the OK button is clicked to save the report file. The file c:\clarion5\frb\reports\people1.rpt is now saved to the hard drive. Each report that you create will be saved to a DIFFERENT *.RPT file.

Caution: Do Not Use the TelcoMgr Report File Names to Save Your Report Changes!
TelcoMgr Report File Names
The TelcoMgr Report Builder will attempt to save your new reports with a name similar to "RPT00001.RPT." The second report that you save will be named "RPT00002.RPT" and the third will be named "RPT00003.RPT" and so on for additional reports. Therefore, end-users are recommended to save report file names using the automatic schema with the built-in serialized report file name.
If you makes changes to one of the TelcoMgr standard reports which are installed with the application, then you should save the changes using "SAVEAS" and let TelcoMgr suggest the appropriate name with the serialized naming schema as described above. If you save your changes with the same name as used by TelcoMgr to store its standard reports, then your changes will be overwritten each time TelcoMgr is upgraded.
Optionally, you may create your own report file names. If you elect to save your reports with your own naming convention, for example "MyTelcoMgrReport01" then it is not necessary to add the ".RPT suffix" at the end of the file name. The Report Builder will append the suffix to your custom file name. Once again, end-users should not use the TelcoMgr report file naming convention to save new or modified reports.
You will also notice that the top of the Report Formatter window now displays some of the information that was just entered above:
![]()
To recap: on this page you learned:
•Every report needs a DETAIL band to extract/print database information
•How to create a new report file and save it to your computer's hard drive
•How to change the dimensions of a report (from portrait to landscape, etc)
•How and where report files (*.RPT) are saved
